Oil tank plug ...
Stopfen für den Öltank...
Little weekend thingy because my old oil tank plug suddenly appeared to me as totally ugly:
Kleine Wochenend-Arbeit weil mir mein alter Öltank-Stopfen auf einmal sehr hässlich vorkam:
So, as usual, what's needed? Some round aluminum (7075) and brass, three rubber rings and...an 8-ball, taken from a mini billiard set, diameter here is about 35mm:
Also, was braucht man? Ein bisschen Rund-Aluminium (7075) und Messing, drei O-Ringe und ... einen 8-Ball vom Minibilliard, Durchmesser ca. 35mm:
First, made a small brass insert for the ball, drilled the ball and glued the insert into it:
Erstmal einen kleinen Messingeinsatz für die Billardkugel machen, die Kugel bohren und den Einsatz einkleben:
The plug itself is pretty simple, turned, with a nice curve on top. It is hollowed out (not visible here):
Der Stopfen an sich ist recht einfach, gedreht, mit einem schönen runden Abschluss oben. Innen ist er hohl (nicht sichtbar auf dem Bild):
Put together and after anodization:
Zusammengebaut und nach Eloxierung:
And finally, attached to the oil tank:
Und am Öltank angebracht:
Cheers,
Axel
Sonntag, 7. April 2013
Donnerstag, 4. April 2013
#15 Raceknuckle
Finally, in very short time the casted part arrived. It was made by Weihbrecht in Wolpertshausen, really nice work using the lost wax model / dead-mold casting process.
Here's the PS model attached to the wax tree which then will be embedded into a ceramic compound:
Endlich, nach kurzer Zeit ist das Gussteil angekommen. Es wurde von der Firma Weihbrecht in Wolpertshausen mit dem verlorenen Wachsmodell / verlorener Form-Gussverfahren hergestellt, sehr schöne Arbeit.
Hier sieht man das PS-Modell am Wachsbaum, das dann von der Keramikmasse umhüllt wird:
The ceramics will then be heated/burned which melts out the wax and PS model. After that the mold is filled with the liquid metal (here AlSi10Mg) and after cooling down the ceramics is removed. Here are the two casted parts, one is intended as spare part (or maybe last resort if I bungle the final machining):
Die Keramikmasse wird nun erhitzt/gebrannt und Wachs und das PS-Modell herausgeschmolzen. Danach wird das flüssige Metall (AlSi10Mg) eingegossen und nach Abkühlen die Keramikform zerstört/entfernt. Hier zwei gegossene Teile, das zweite als Ersatzteil oder als "letzte Hoffnung", falls bei der Endbearbeitung des ersten etwas schiefgeht:
It is tested for leak tightness, so should work all right. My work with this part starts now which means grinding, inside and outside, machining both round flanges on bottom and flat one on top.
Die Teile sind auf Dichtigkeit getestet worden, sollten also funktionieren. Meine Arbeit an diesem Teil fängt nun an, heisst innen und aussen schleifen, die beiden runden Flansche auf Maß bearbeiten und den flachen oberen Flansch.
Cheers,
Axel
#2 Panhead parts
A nice little air cleaner ... some years ago I changed carb on my Pan from S&S Super E to Dell'Orto PHM38, by far the best modification ever. I made an adaptor ring for attaching the S&S air cleaner to the PHM38 but, since the Dell'Orto is wider, I always had problems with storing my right leg somewhere.
So I decided to make a new slim air cleaner. What do you need for that? First of all a K&N filter element (E-3200) and a pair of round aluminum discs (7075):
To have some insight into the carb, I'd wanted to have a small window on the outer cover plate, so some 5mm plexiglass is needed. Cut a part off and turn it round to 90/70mm:
Turned the outer cover from the outside and inside and test fitted the acrylic window:
Turned the inner cover from the outside and inside, as well as mounting holes:
Looks good so far:
Since the mounting adaptor is only screwed onto the carb, a locking mechanism must prevent the complete assembly from becoming loose. I don't want to use grub screws but found a nice stud on the carb I used for locking. The small cup is attached to the backplate of the air cleaner and prevents the whole assembly from rotating:
I reused the old mounting adaptor for the S&S air cleaner and drilled some new holes for mine:
For mounting the two plates together while keeping the distance between the two covers six spacer bolts like this were made:
Finally all parts were ready, bead blasted, sent out for anodization (black) and came back with a nice finish:
The mounting adaptor was grinded and polished on the inside:
Now, the mounting of all parts...first the adaptor ring and the inner plate:
Next, the six spacer bolts and the filter element:
The acrylic window was glued into to outer plate:
And finally, screwed onto the spacer bolts:
And nice insight into the carb:
Done!
After some months of riding the window is still clear and carb interior is still visible. In light rain there's no problem with carburetion if the filter element is properly oiled, for heavy rain I always carry a K&N cover in my bag that slips on and of the filter element easily.
Cheers,
Axel
So I decided to make a new slim air cleaner. What do you need for that? First of all a K&N filter element (E-3200) and a pair of round aluminum discs (7075):
To have some insight into the carb, I'd wanted to have a small window on the outer cover plate, so some 5mm plexiglass is needed. Cut a part off and turn it round to 90/70mm:
Turned the outer cover from the outside and inside and test fitted the acrylic window:
Turned the inner cover from the outside and inside, as well as mounting holes:
Looks good so far:
Since the mounting adaptor is only screwed onto the carb, a locking mechanism must prevent the complete assembly from becoming loose. I don't want to use grub screws but found a nice stud on the carb I used for locking. The small cup is attached to the backplate of the air cleaner and prevents the whole assembly from rotating:
I reused the old mounting adaptor for the S&S air cleaner and drilled some new holes for mine:
For mounting the two plates together while keeping the distance between the two covers six spacer bolts like this were made:
Finally all parts were ready, bead blasted, sent out for anodization (black) and came back with a nice finish:
The mounting adaptor was grinded and polished on the inside:
Now, the mounting of all parts...first the adaptor ring and the inner plate:
Next, the six spacer bolts and the filter element:
The acrylic window was glued into to outer plate:
Looks good from the front:
And nice insight into the carb:
Done!
After some months of riding the window is still clear and carb interior is still visible. In light rain there's no problem with carburetion if the filter element is properly oiled, for heavy rain I always carry a K&N cover in my bag that slips on and of the filter element easily.
Cheers,
Axel
Montag, 1. April 2013
#1 Panhead parts
Something different...
About three years ago I started to make a new pressure plate for my Panhead. I didn't mount it that year, then had an accident that made a complete rebuilt of the Panhead necessary which took almost one year. Last year I drove it as it was so...I finished and mounted it today as part of the seasons preps.
All started with a drawing:
Machining of the counter bracket for the coils (10):
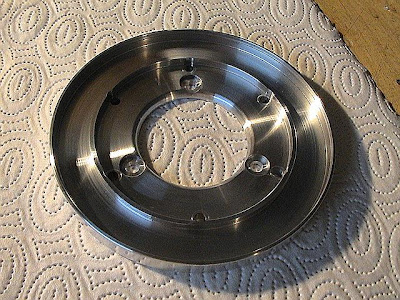
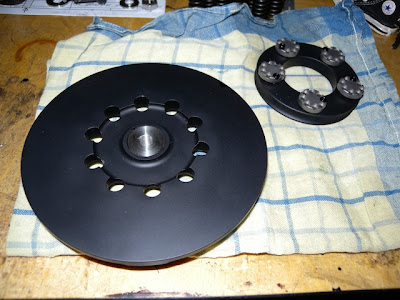
I bagged them because this one and the pressure plate itself will be send to a local shop for giving them a nice black anodization:
Drilling and milling of the pressure plate:
Almost finished, only turning the cone needs to be done:
And finished!
Assembled like a charm with only one minor flaw: finding the nuts position to tighten the locking screws was a bit tricky.
Cheers,
Axel
About three years ago I started to make a new pressure plate for my Panhead. I didn't mount it that year, then had an accident that made a complete rebuilt of the Panhead necessary which took almost one year. Last year I drove it as it was so...I finished and mounted it today as part of the seasons preps.
All started with a drawing:
Machining of the counter bracket for the coils (10):
I bagged them because this one and the pressure plate itself will be send to a local shop for giving them a nice black anodization:
Special nuts made of titanium (because I like the dull finish). The holes will be for the locking screws (M3):
Drilling and milling of the pressure plate:
Almost finished, only turning the cone needs to be done:
Finished and sand blasted:
For fitting I made a nice little helper which enables me to compress all the springs and take the complete assembly to fit onto the clutch studs:
Aluminum (7075) parts back from anodization:
Complete assembly with springs, nuts, everything...
Pressed in a threaded bushing:
Compressed the springs, ready for mouting it to the clutch studs:
And finished!
Assembled like a charm with only one minor flaw: finding the nuts position to tighten the locking screws was a bit tricky.
Cheers,
Axel
Abonnieren
Kommentare (Atom)


